
Previously we went over the steps of drafting and sending an invoice. In this post we will look at the Steps for receiving, and then making a payment on the invoice.
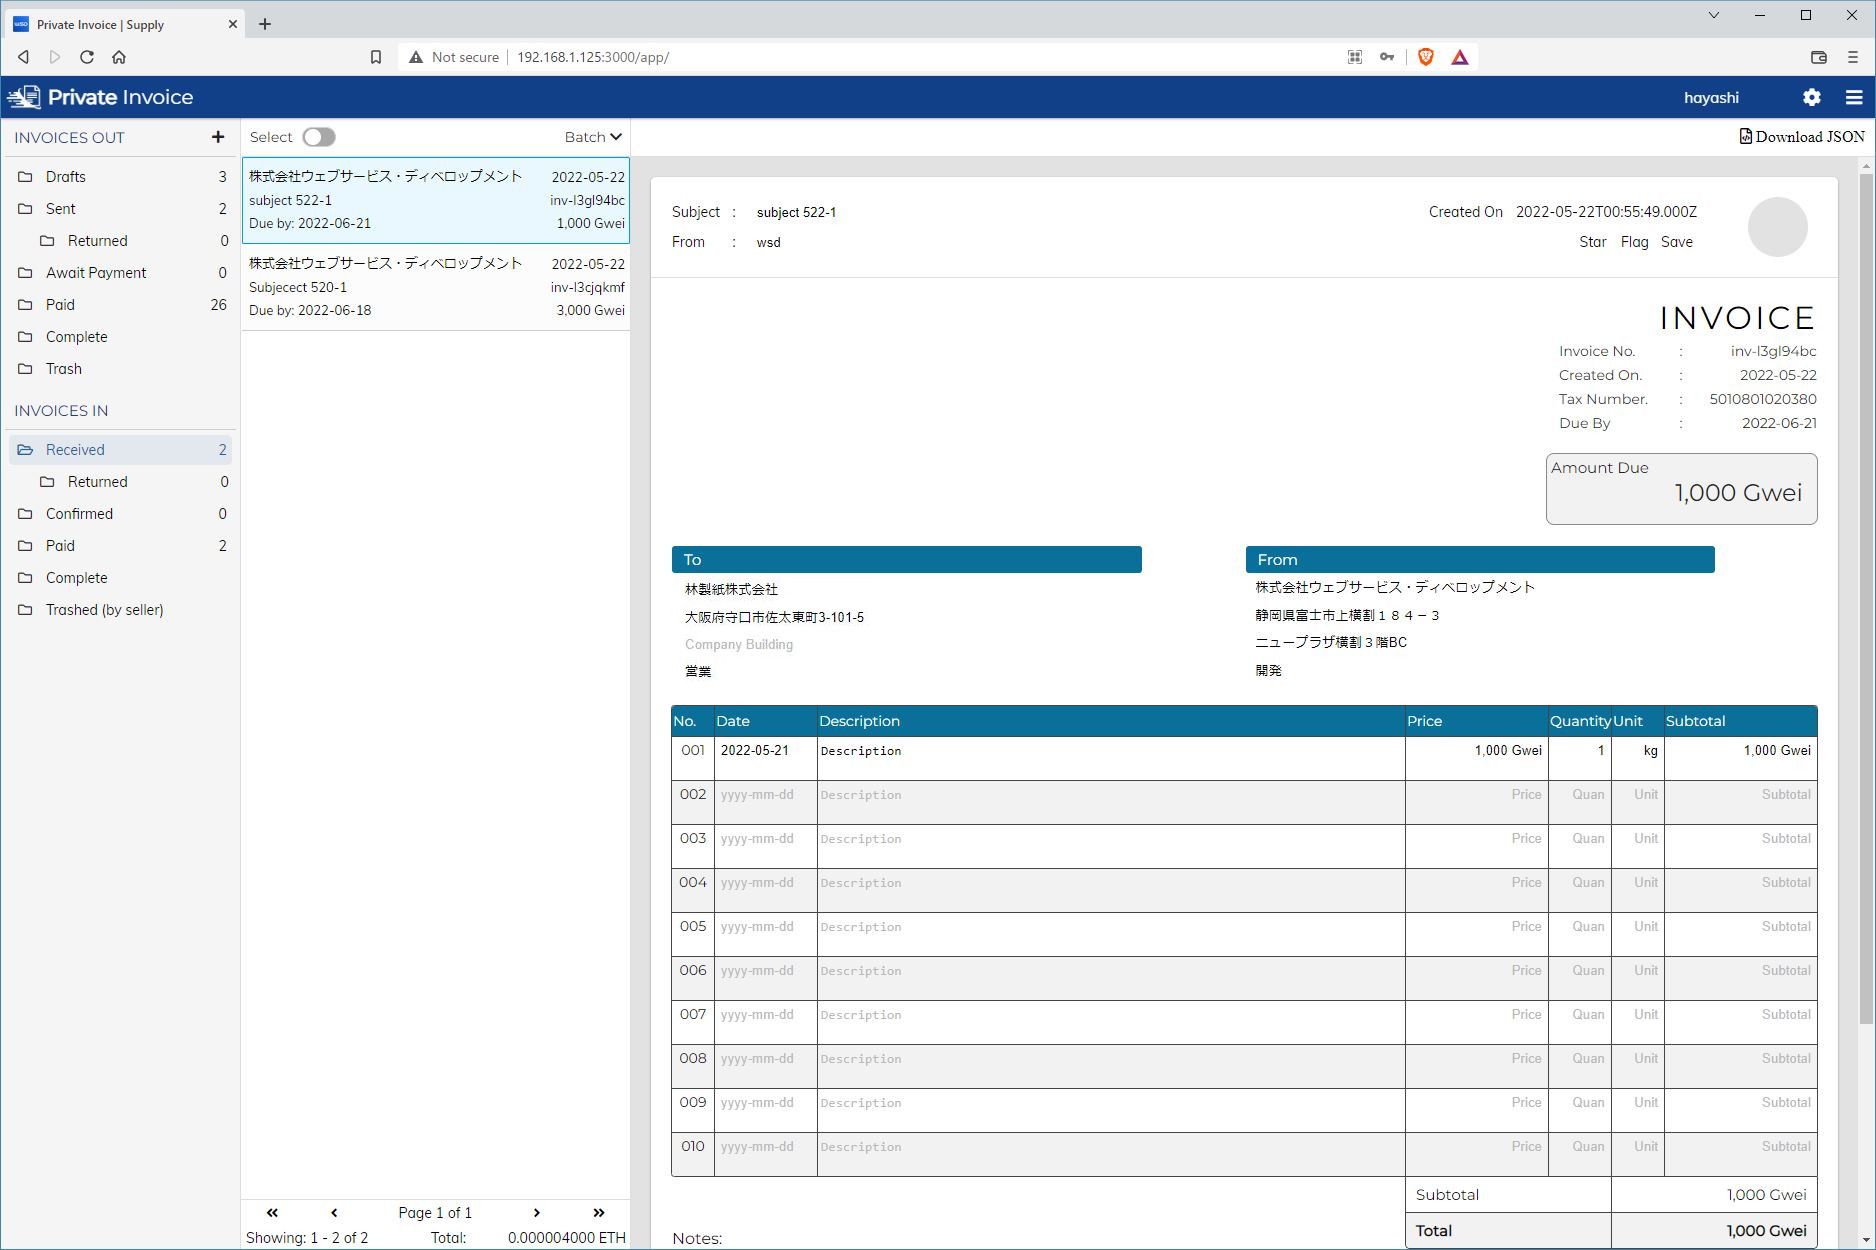
Once we login as the buyer user, we see that the invoice that was sent in the previous post is now in our Received folder. We can see who it is from, the details and the amount.
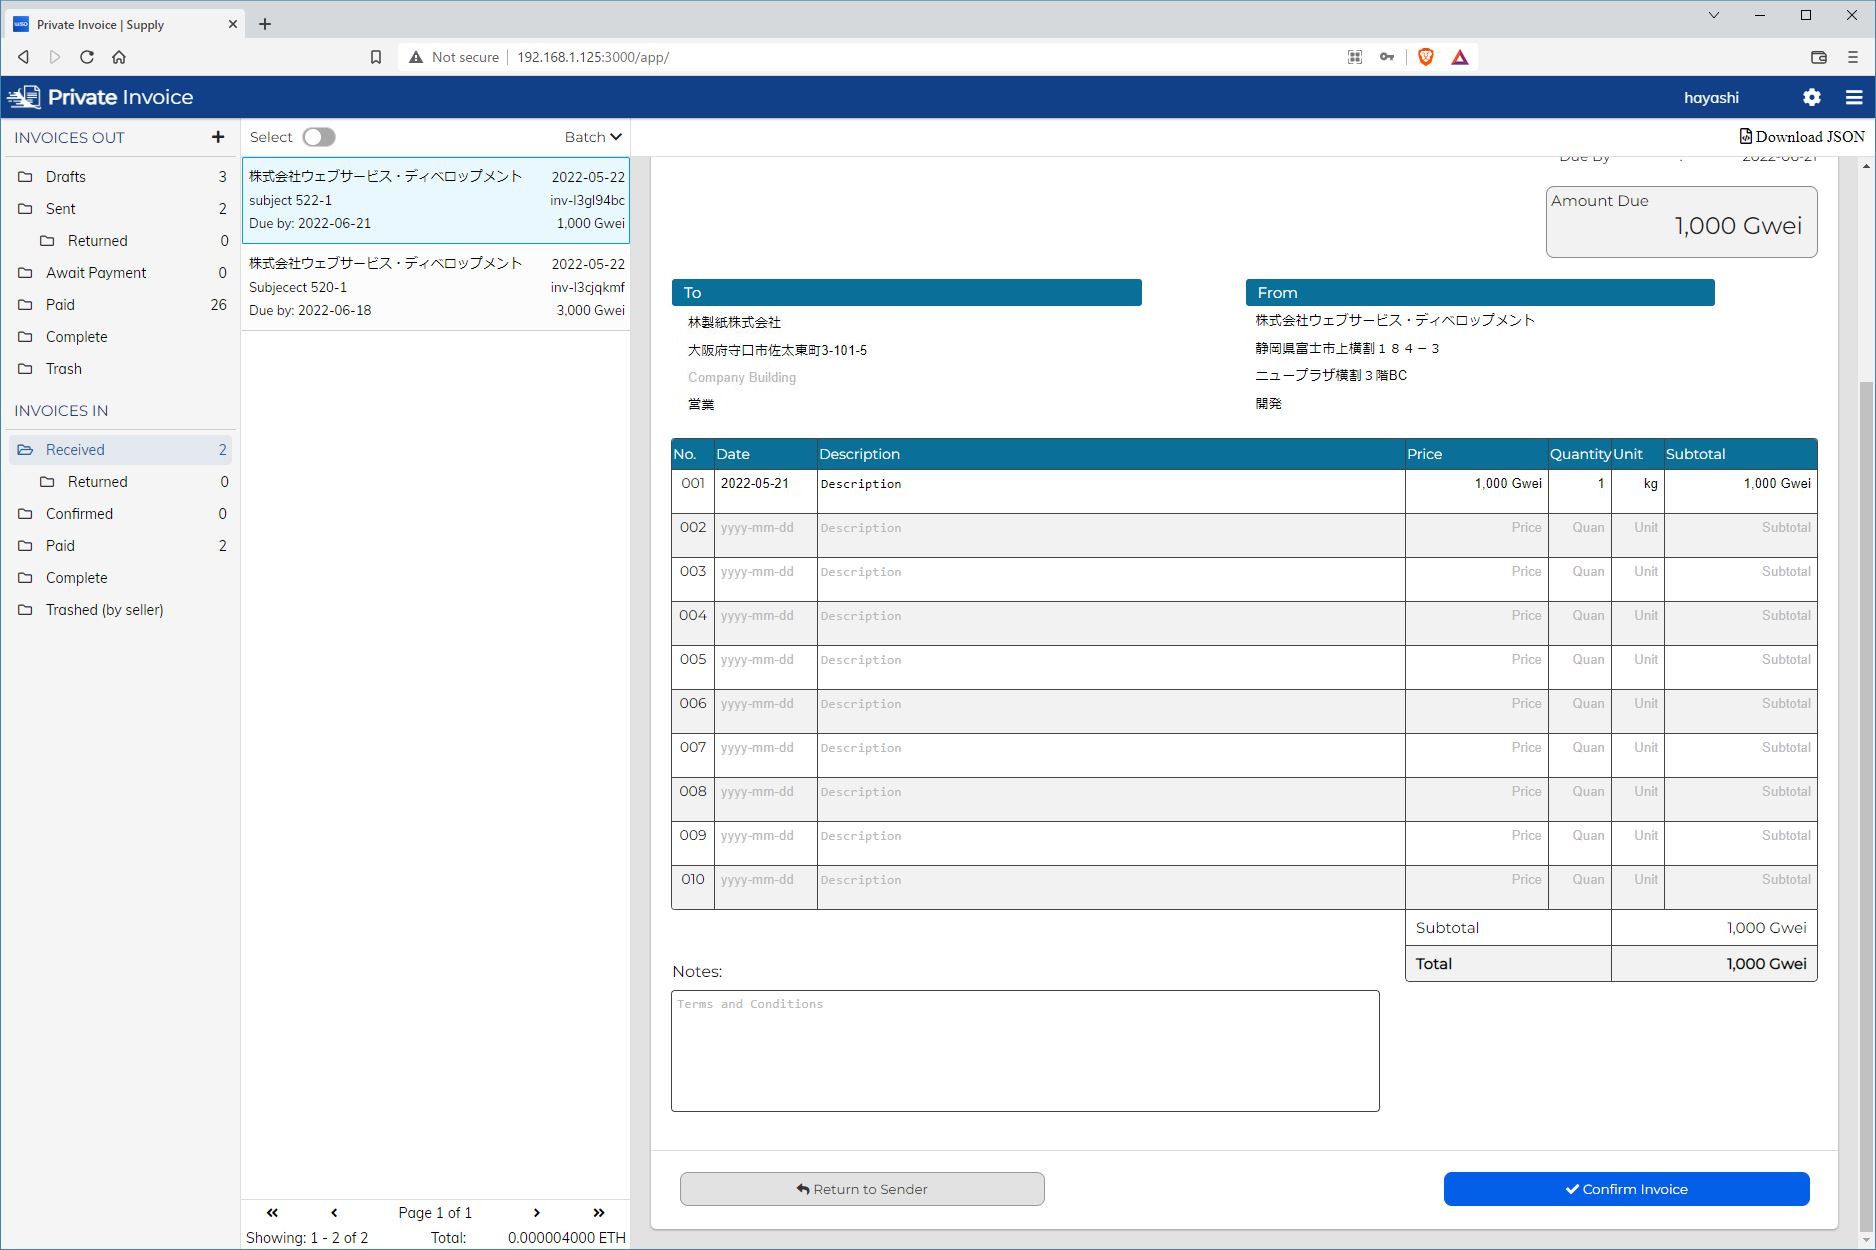
If we scroll down, we see the options to Confirm Invoice or Return to Sender. In this case Confirm Invoice is the happy path. We found that there are a lot of workflows where the invoice must first be confirmed in that the goods or service have been delivered or rendered, and then from those confirmed invoices, funds are then allocated for the payment to take place.
In this case Return to Sender is the inverse of that operation, where the seller is challenging that the contents of the invoice are either valid or incomplete. A common case for this would be that a certain number of delivered items failed inspection and the price needs to be reduced. Invoices can only be received by contacts, which acts as whitelist. Ideally only parties that you trust would be involved in this process.
Once an invoice has been marked as confirmed, it then moved into the Confirmed folder for the buyer, and the folder of the seller is moved to Await Payment.
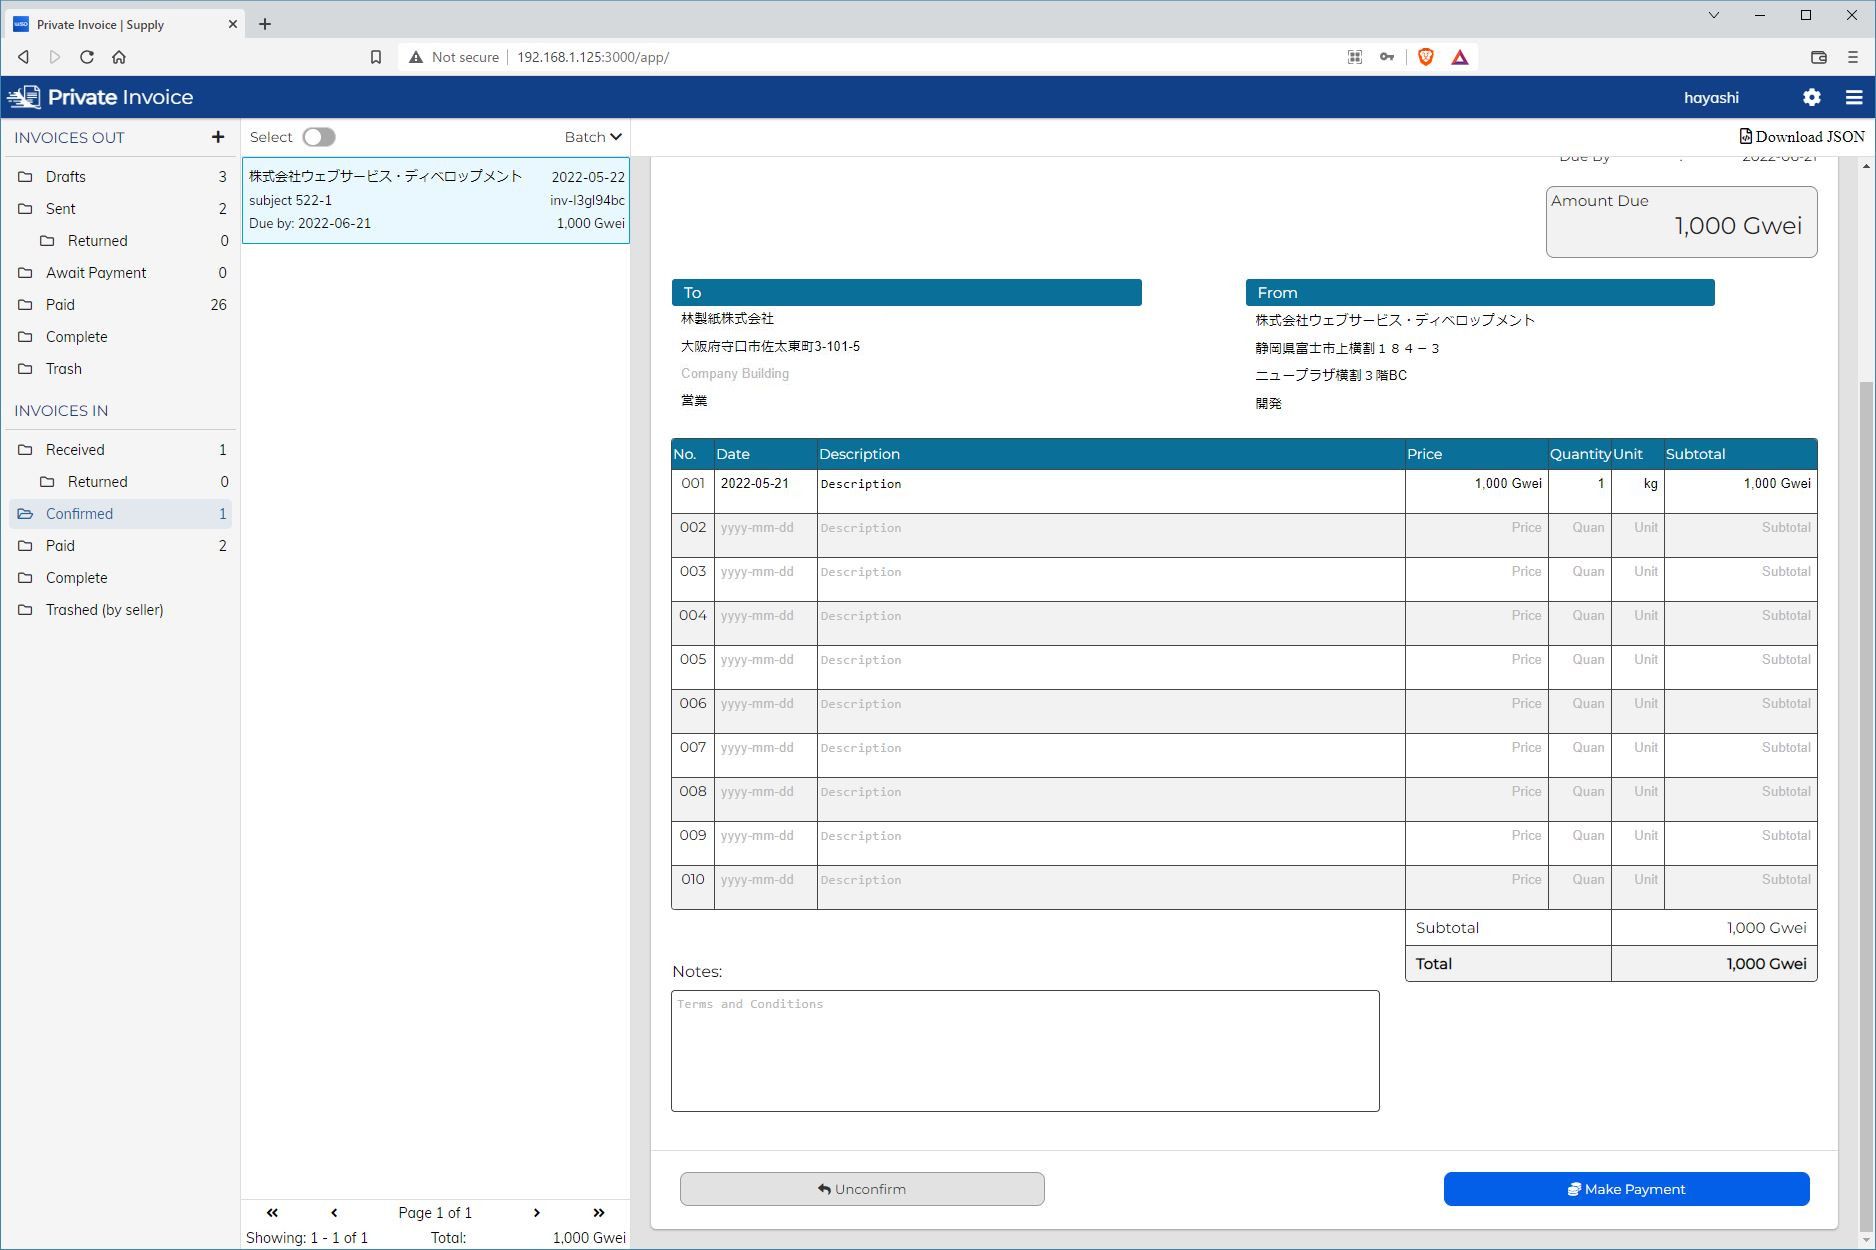
From the Await Payment folder, we see a similar set up with two options at the bottom with Unconfirm or Make Payment. The Unconfirm option is for chances where an error with an invoice happened after confirmation. Everyone makes mistakes, so this gives the buyer a cnahce to correct it. The Make Payment option should be self-explanitory, but we will walk through the flow.
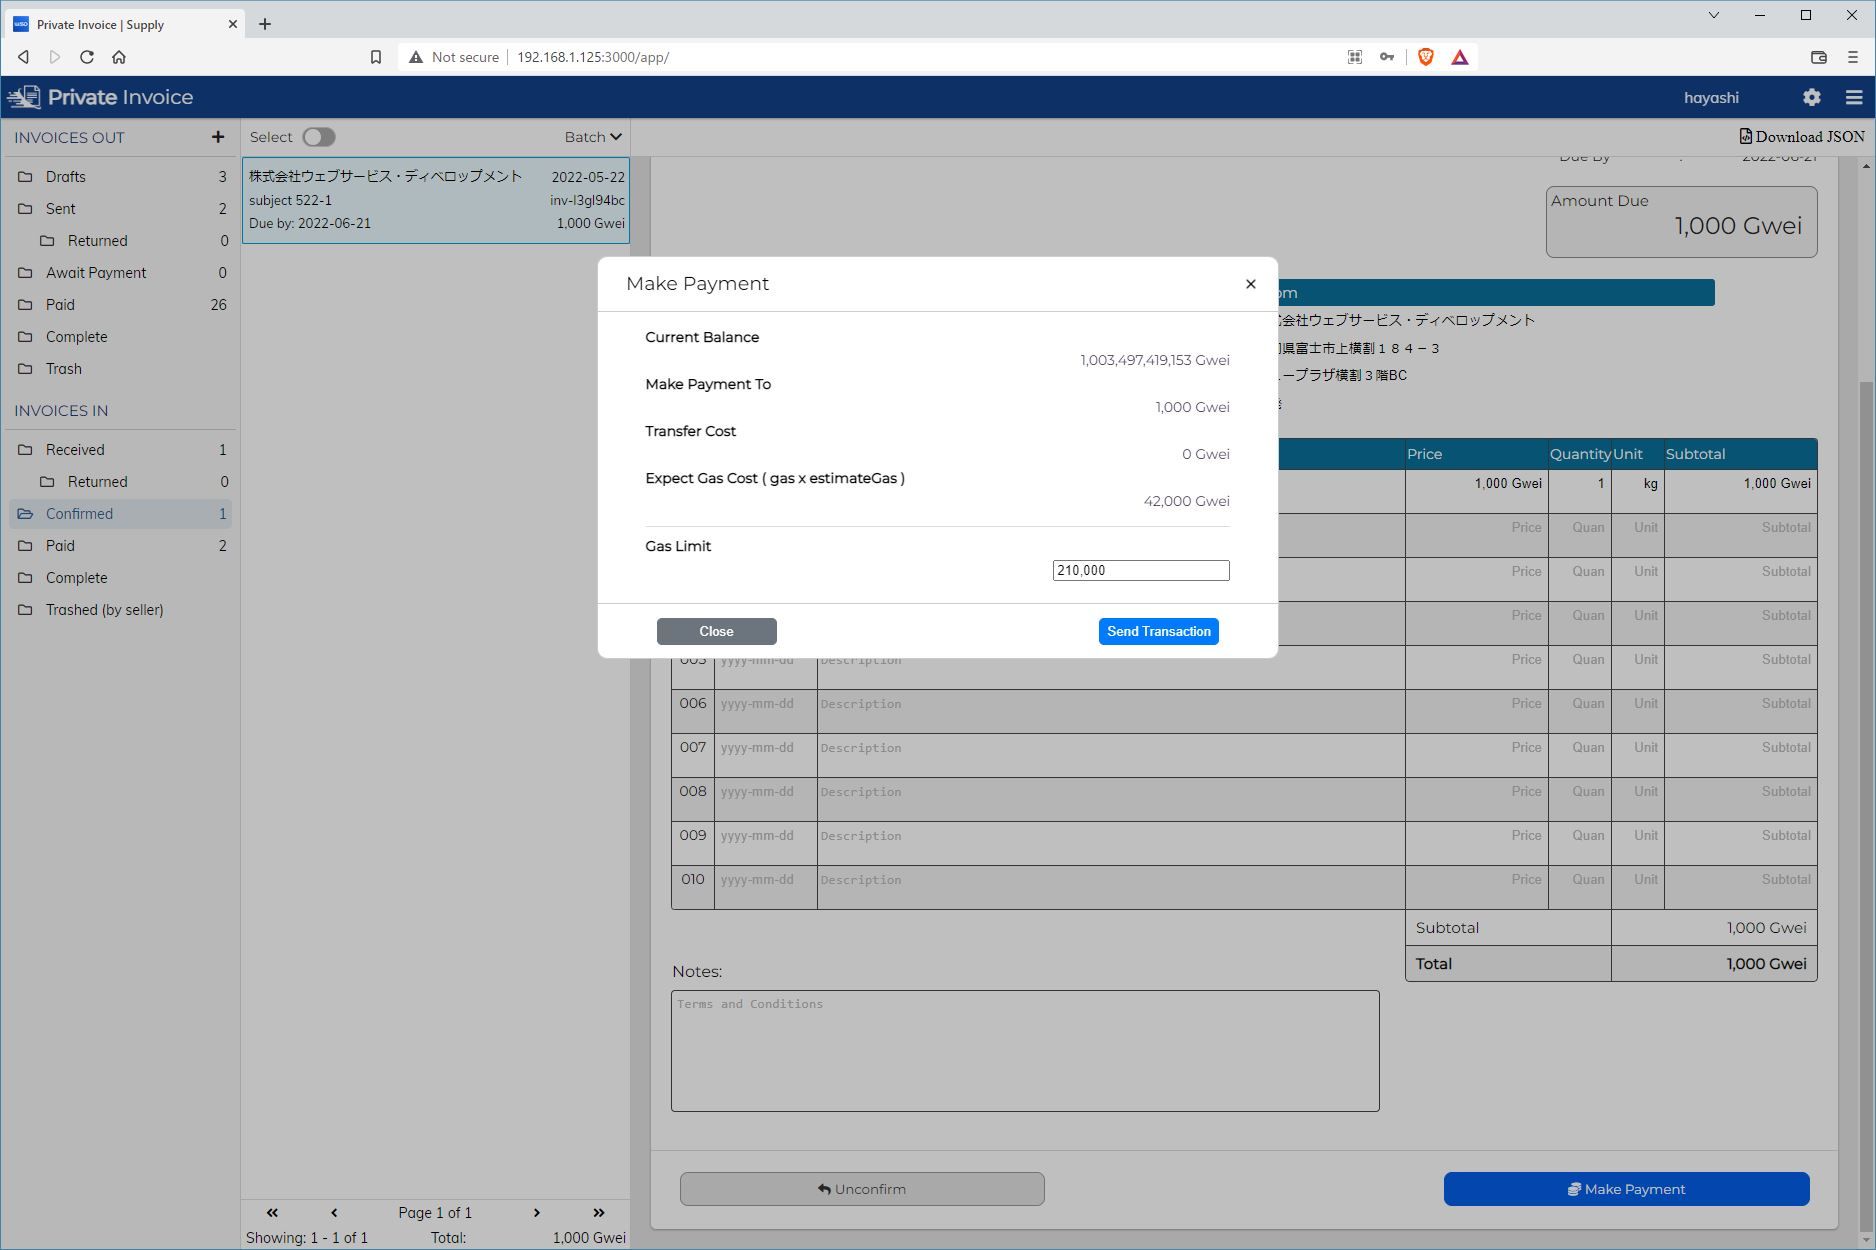
First a modal appears that gives your your current balance. The amount to be paid on the invoice, any transfer costs, and the expected gas price. From here you can cancel or make the payment.
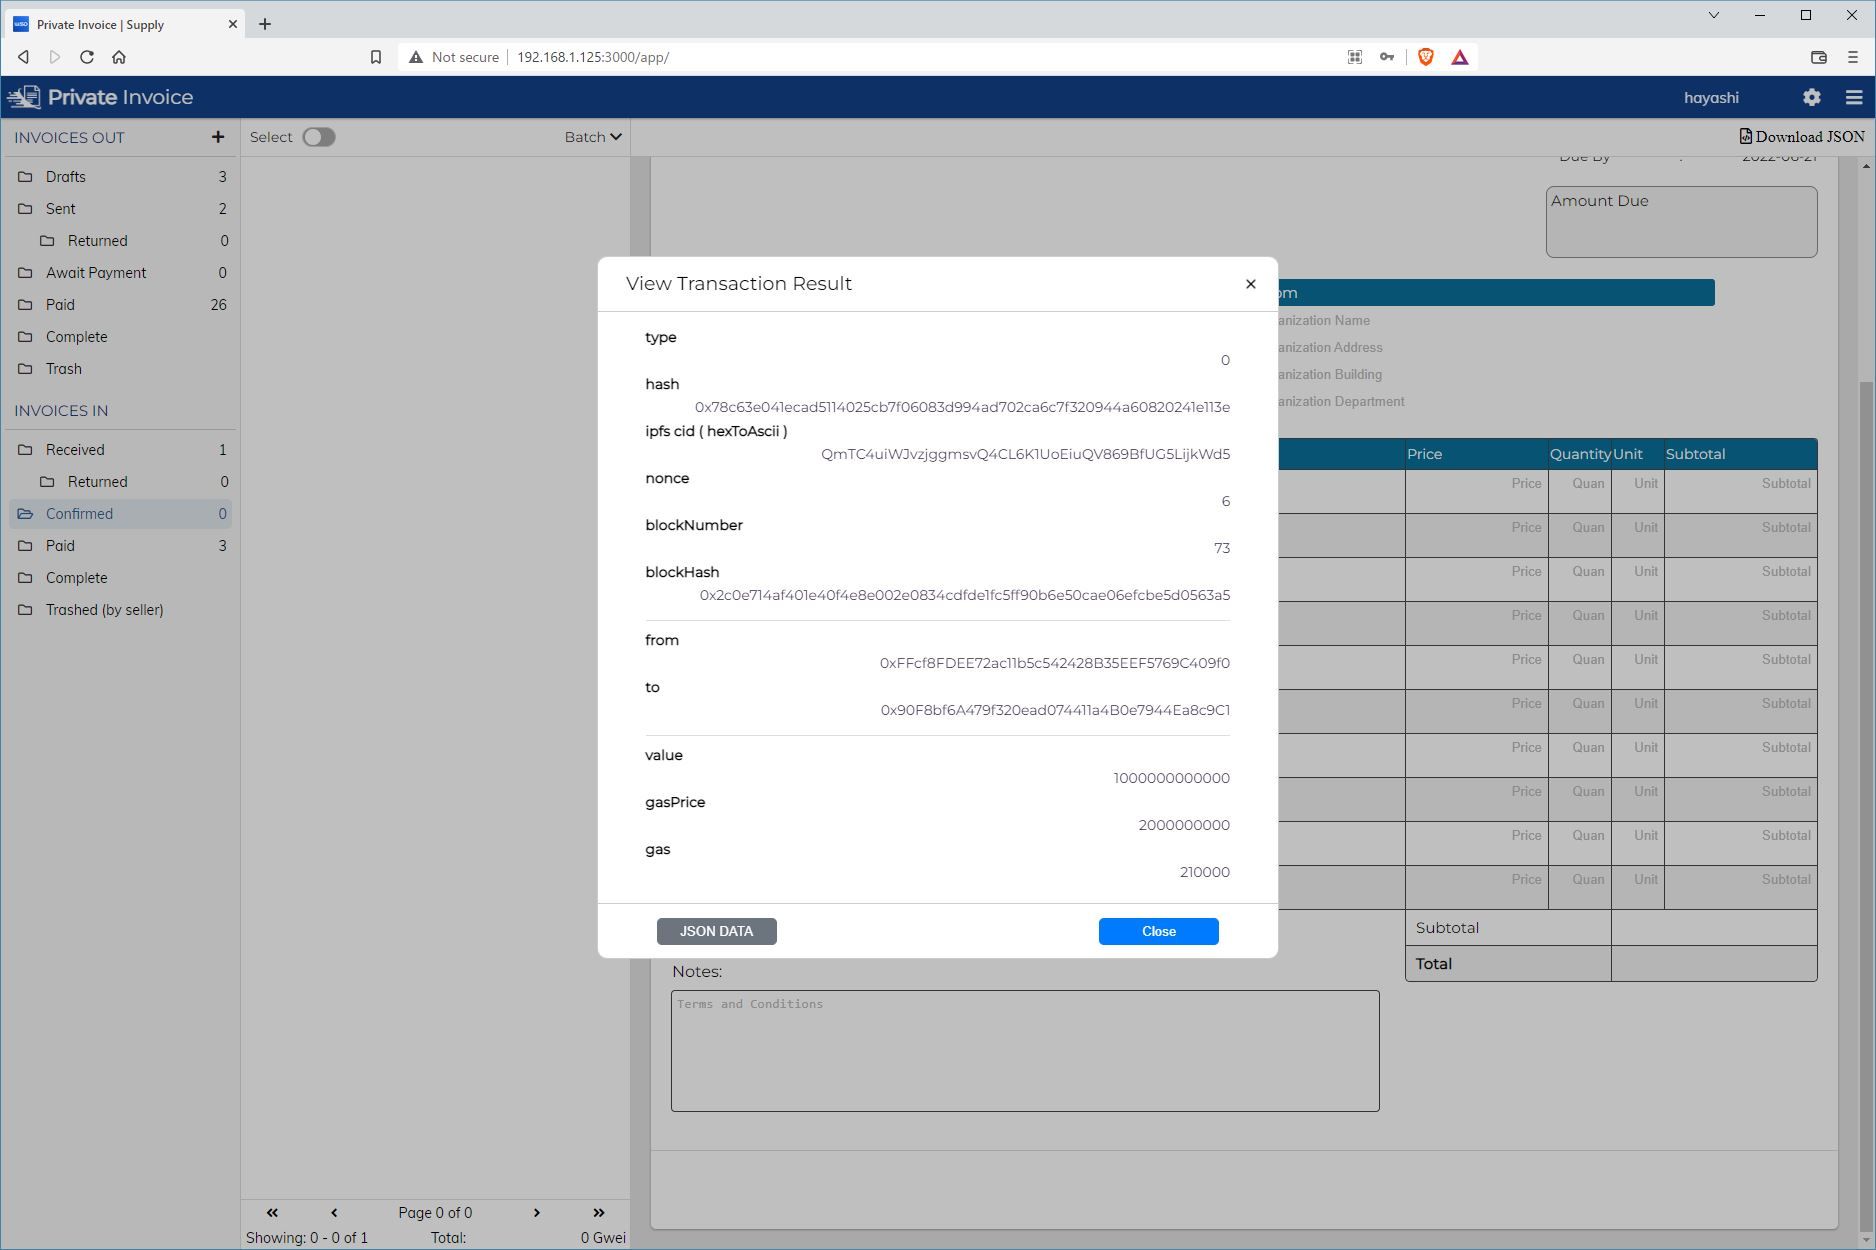
It will take a second for the payment to be made. Once it is complete we will be shown a receipt for the transaction, which gives the block number, block hash and transaction hash. And for testing we are storing the invoice in IPFS, getting the CID and setting it in the transaction so that a specific invoice can be associated with a specific transaction.
Currently the steps with storing infomation from IPFS are being done with standard ETH transactions, but instead of publishing this information on the internet, this functionality is likely better served with a smart contract to keep the information contained within the parties involved.
Being able to associate a single transaction with a specific invoice (or potentially multiple invoices), is a design goal for being able to use ETH and blockchains for better accountability and traceability for where and how funds are allocated within an organization.
This post concludes the basic functionality of the application, which includes the basic loop of creating invoices on the seller side, and making payments on the buyer side. In the next post we will go over the settings and start to get into how contacts work.
